Item creation screen
- Main Functions
- Selecting items to display in the list.
- Setting the text size, color, date and time format of items.
- Item 6 types + Repeat item 3 types
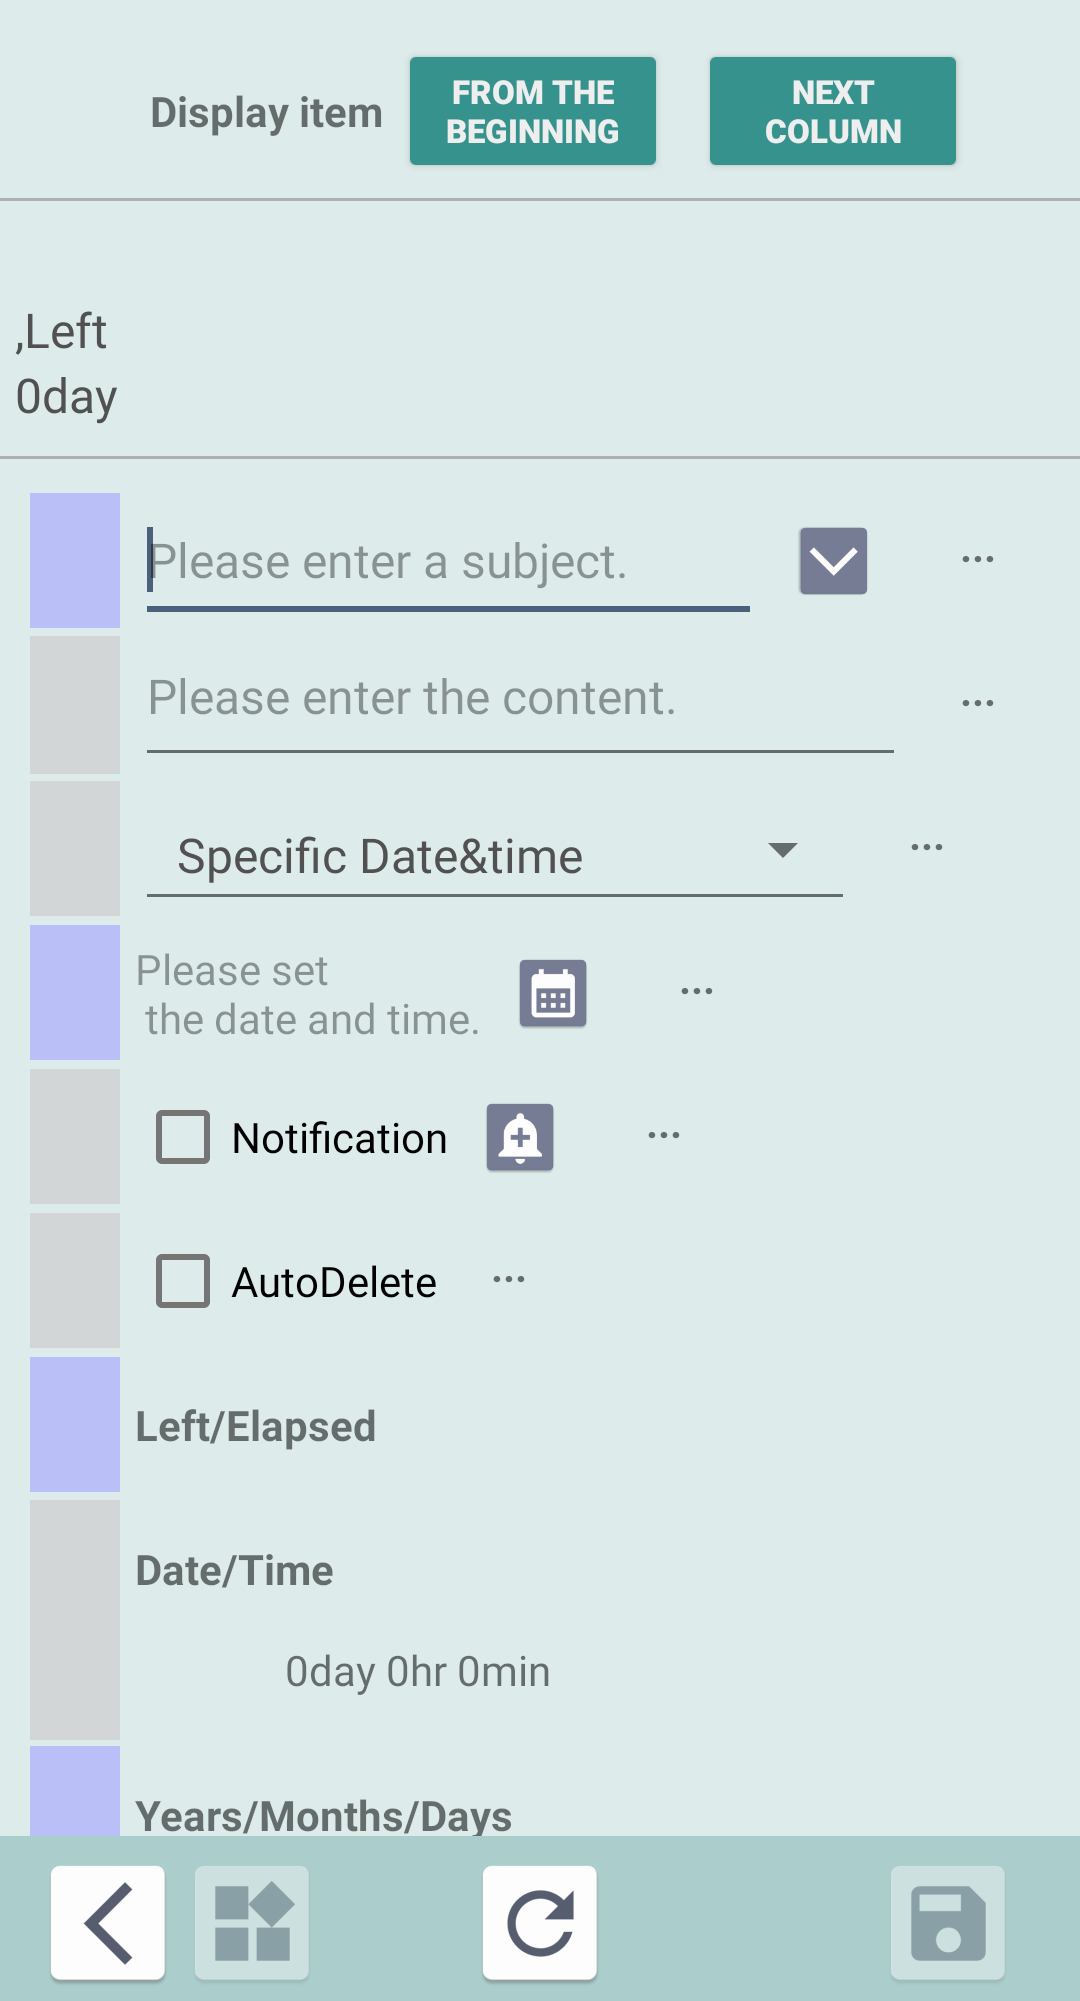
- About "Display items" of Item
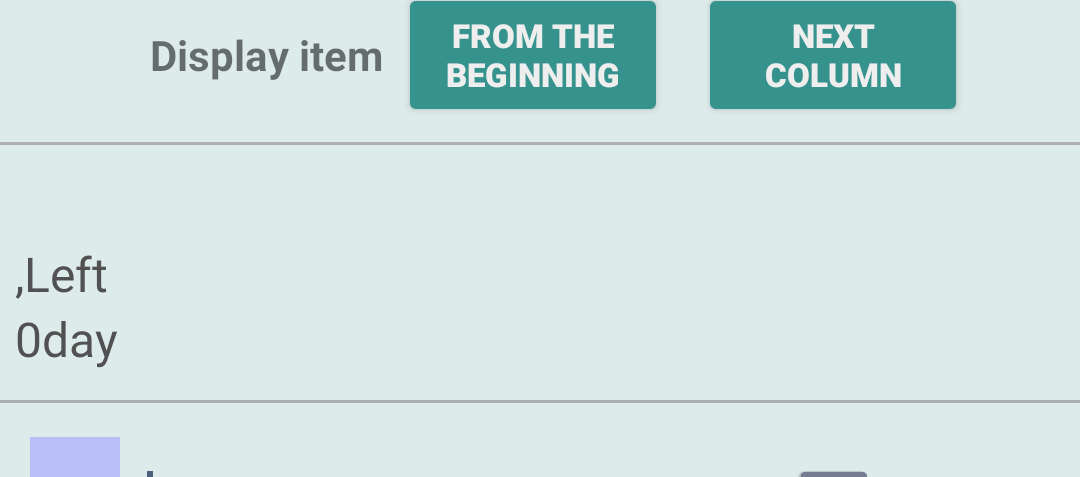
- One item displayed on "List screen (home screen)" etc. has a setting frame of 3 x 3 display items.
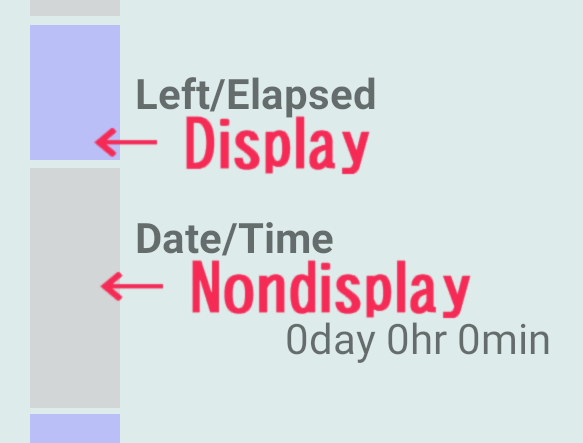
- Tap the square frame (blue/gray) to the left of each item to toggle the display.
- blue is display, gray is non display.
- You can edit while checking the displayed contents.
- Each selection is added from top left to bottom, top center to bottom, top right to bottom.
(Up to a maximum of 9 items in the order of numbers ① to ⑨ in the image above)
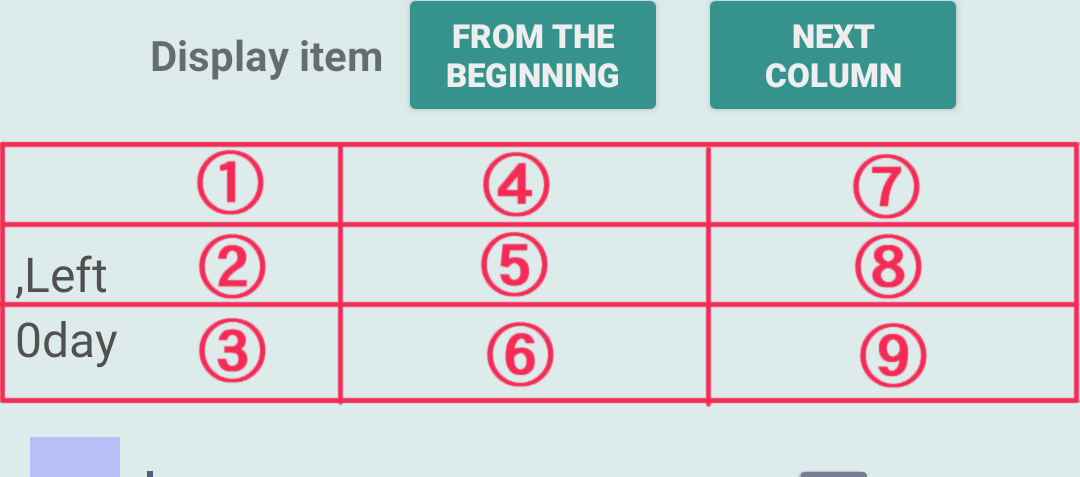
- Display items

- FROM THE BEGINNING : Clears the set display items.
- NEXT COLUMN : Moves the display position to the next column without setting items in the second or third row.
- Title and Content

- Title : This field is a required item. (up to 50 characters)
- Content : Multi-line text can be set. (up to 200 characters) The software keyboard can be dismissed by touching the down arrow icon(
 ) to the right of the input field.
*Although we have prepared the number of characters that can be entered with a margin, please be aware that if the number of characters is too large, the layout will be difficult to see.
- Item type
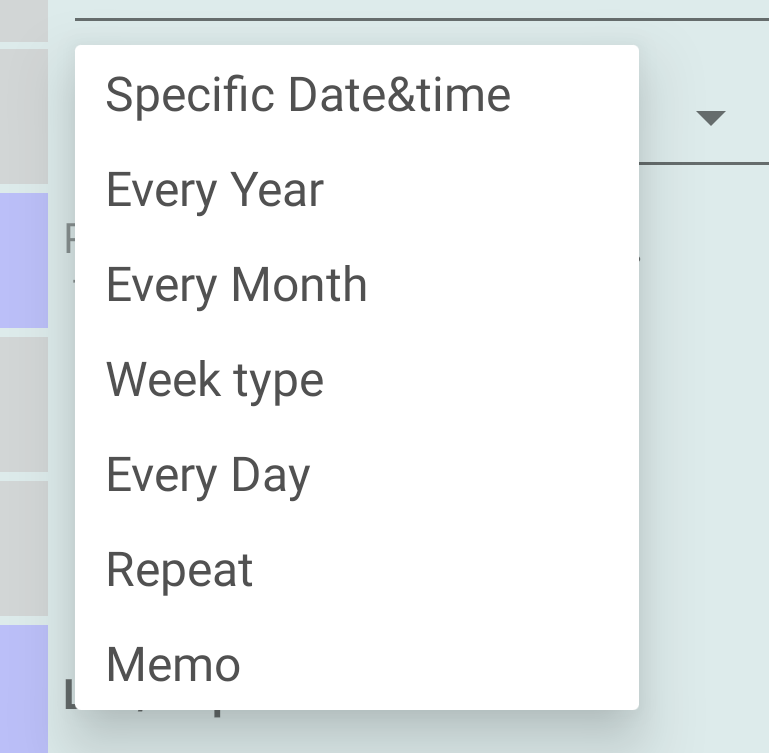
- Specified Date&time : Create an item by specifying the date and time.
- Every Year : Please use it for birthdays, anniversaries, etc.
- Every Month : Please use it for monthly events.
Multiple dates can be specified.
If the specified date does not exist, it is set to the previous date.
(Example) If you specify the 31st, February will be the 28th and April will be the 30th. - Week type : Please use it for weekly events.
It is created by a combination of weeks and days of the week.
(Example of use) The duty is Wednesday and Friday of the 2nd and 4th week. - Every Day : Please use it for daily task management.
- Repeat : Items created with this type can be referenced in the "Repeat Playback screen".
The usage and operation differ depending on the "Day unit", "Minute unit", and "Second unit".
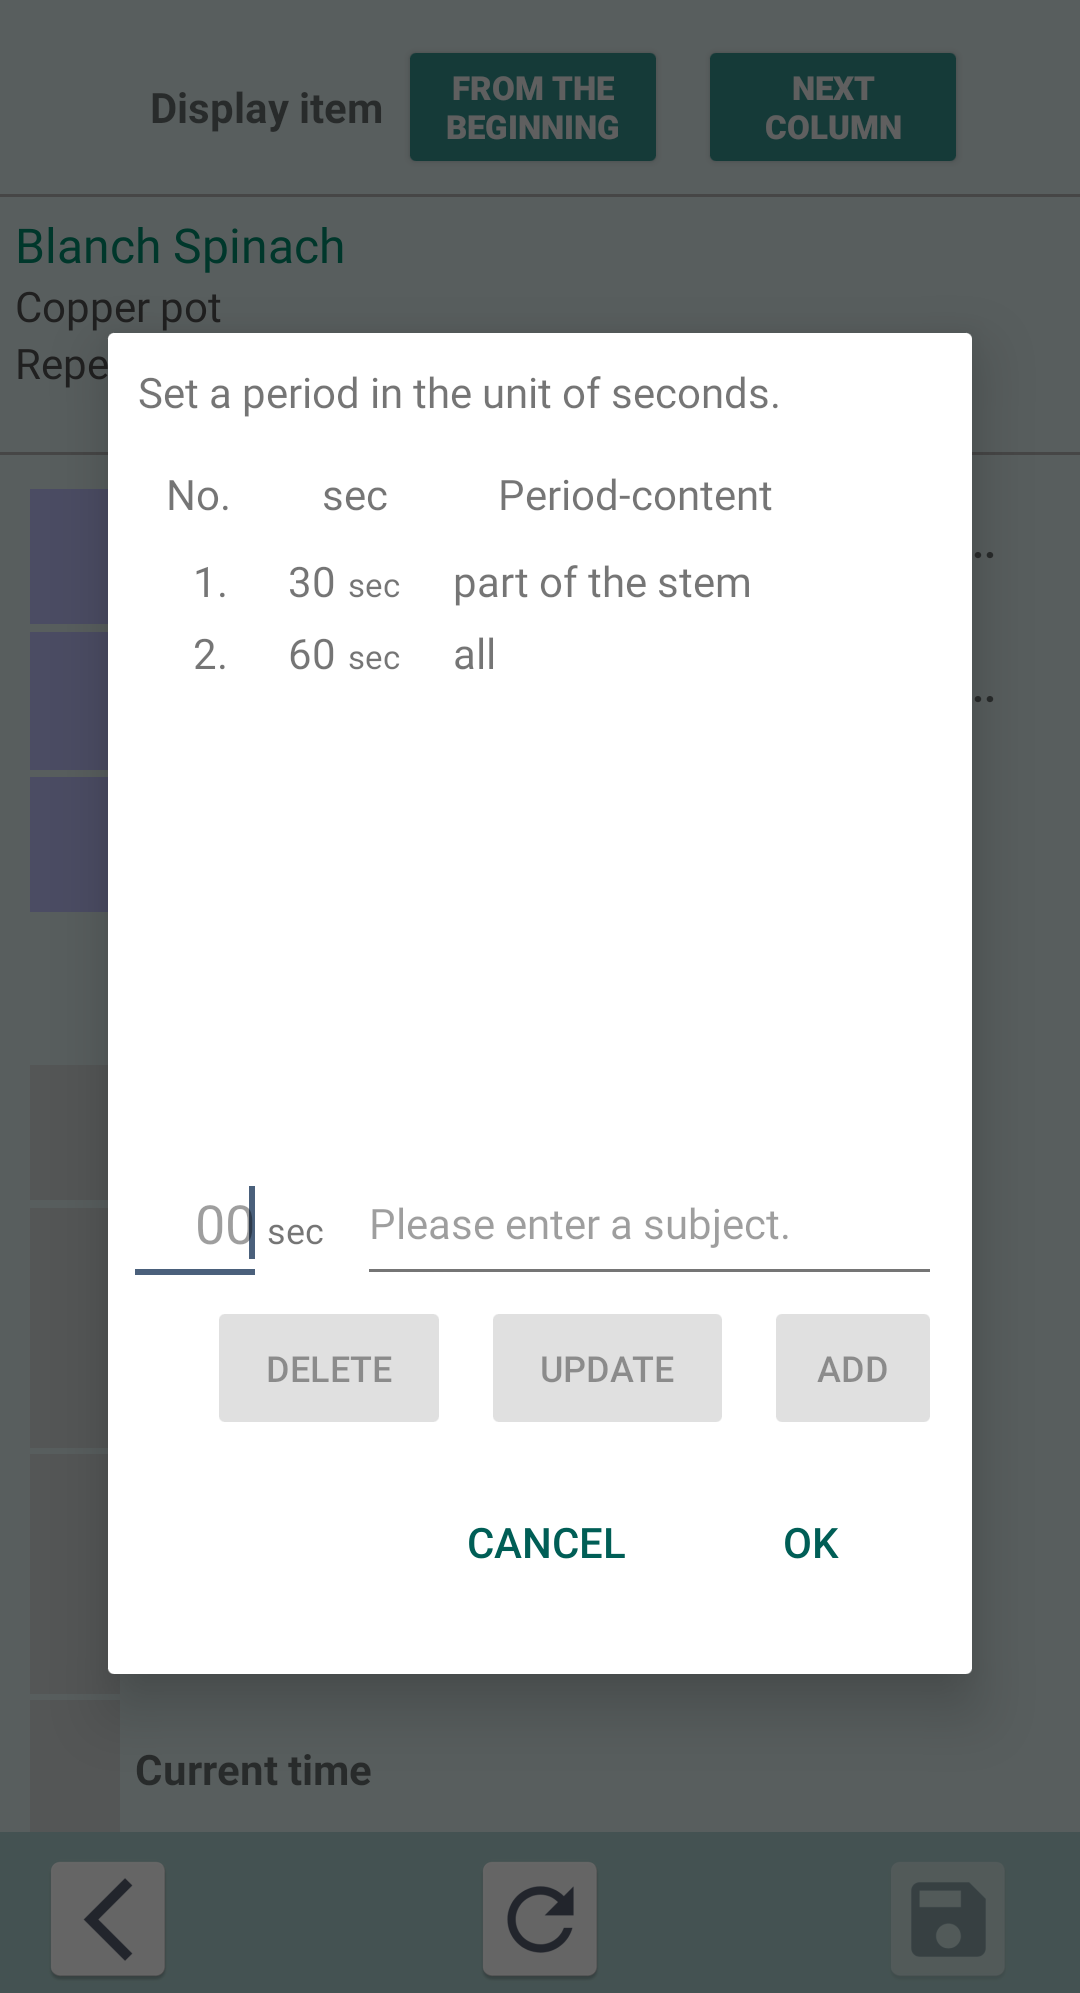
(Period setting dialog) - Day unit : Use for projects, tasks, etc. that require a long period of time.
*For "Day unit", it stops at the end date and does not automatically repeat. - Minute unit : Please use it when you want to manage cooking and training in minute unit.
- Second unit : Please use it for training, breathing methods, simple measurements, etc. that require second unit.
(Not a high-precision timer function. Depending on the contents, it cannot be used for experiments with high importance.) - Please also check the contents of the "Repeat playback screen".
- Memo : Use it as a sticky note or for anything that doesn't need to specify a date and time.
- Notification function

Please refer to "Notification function".
- Auto Delete

- This can only be set for the "Specified Date&time" type.
- After "Notification", the item is automatically deleted.
- "Left/Elapsed" and "Date/Time", "Years/Months/Days", "Time/Minutes", "Total days", "Weeks/Days", "Total minutes"
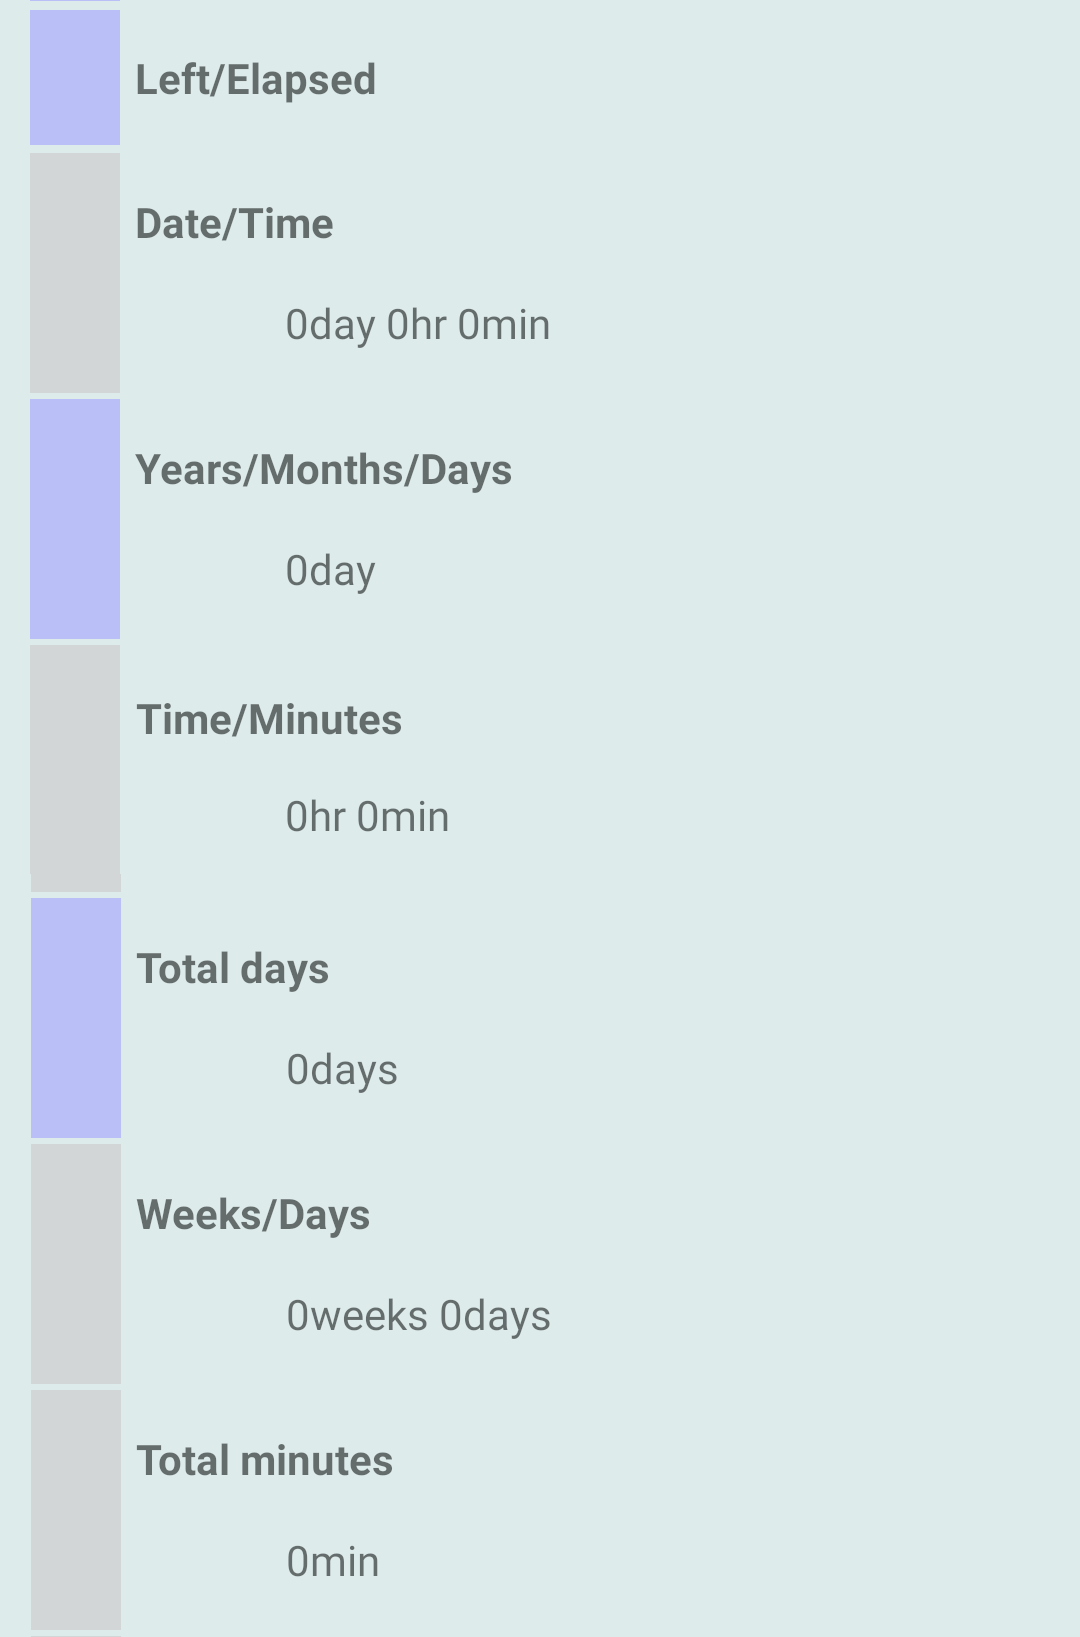
- "Left/Elapsed"
The current date and specified date time are compared, and if the specified date and time have not elapsed, the text of the display item becomes "Left"; if the current date and time have elapsed or have passed, the text becomes "Elapsed".
"Specified Date&time" type and "Repeat Day unit" may be "Elapsed", but other types are always "Left". - "Date/Time", "Years/Months/Days", "Time/Minutes", "Total days", "Weeks/Days", "Total minutes"
These are the differences between the current date and the specified date and time. These items are expected to appear in combination with the words "Left/Elapsed".
(example) 243min left, 2years 7months 14days left etc.
- "Current Date/Time", "Current date", "Current time"
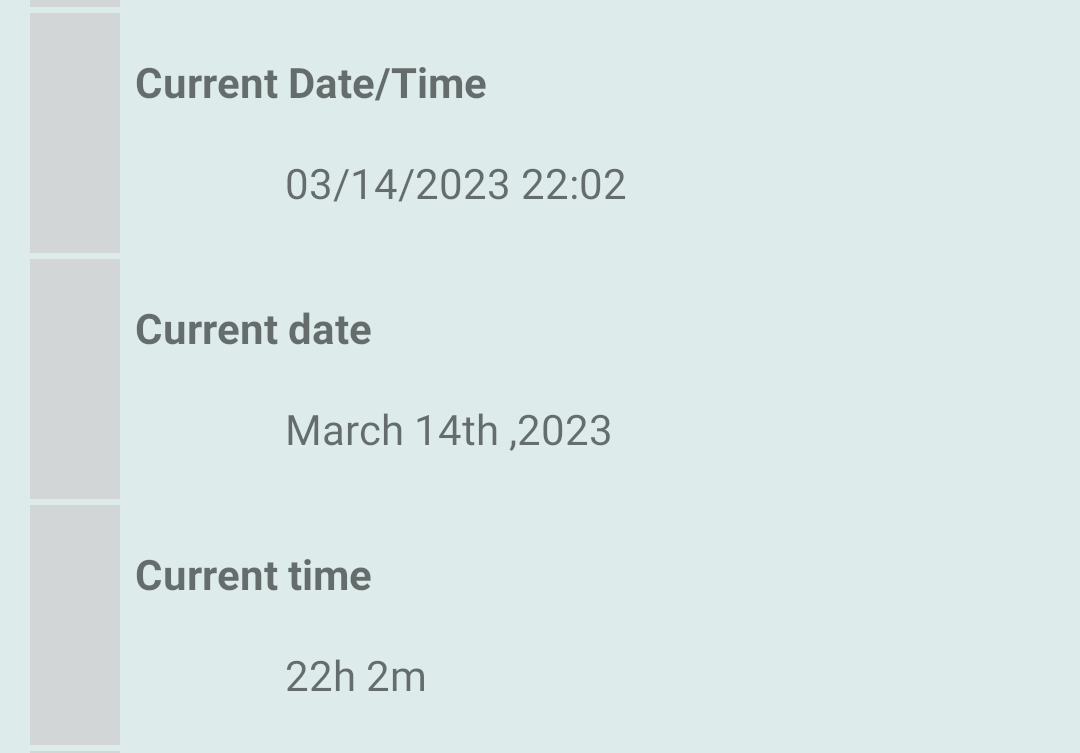
- These are useful for displaying on a "single item widget" as a replacement for a clock.
- "Created date"

- This is useful when looking back on the date (creation date) when the goal was set.
- Formatting

- Click "..." to the right of "Subject" - "Auto delete" to set.
- For "Left/Elapsed" to "Date Created", click the line area of the item to set it.
(Example: In the case of "Date/time". The red frame part of the image)

* If the system is set to high contrast, colors will not be displayed correctly.
- Back button

- Cancels the settings and returns to the "List screen (home screen)" .
- Refresh button

- Restores the settings to their initial state.
- Save button

- Save the item and return to "List screen (home screen)".
- Widget add button

- After the item is saved, a request is made to the Android Home application to add the widget.
- When added, it becomes a dedicated widget for the item you created.
- If you cannot add the widget depending on your environment, please refer to "Widget" and try to associate the widget from the widget list.
Table of contents